Thursday, March 22, 2012

Discrete Switched Capacitor Boost Converter

Discrete Switched Capacitor Boost Converter:

Ivan Sergeev writes:
A switched capacitor / charge pump boost converter works by repeatedly charging a flying capacitor to an input voltage source and then stacking it on top of the input voltage source. This is achieved in the ideal schematic above by closing alternate switch pairs SW1/SW4 and SW3/SW2. When SW1/SW4 are closed, C1 is charged to voltage source V1. When SW3/SW2 are closed, C1 is stacked on top of voltage source V1. After some start up time, the big hold-up capacitor C2 is charged to 2*V1, and the load R sees roughly 2*V1 provided that it does not pull the charge out of C2 faster than it is replenished.
Discrete Switched Capacitor Boost Converter - [Link]

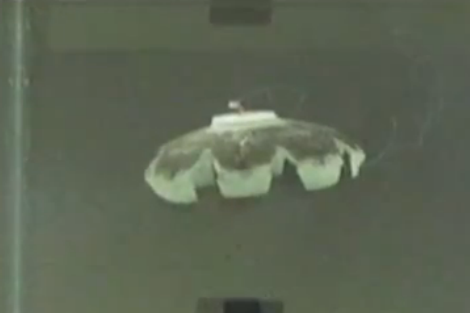
Robot jellyfish fueled by hydrogen from the water around it

Robot jellyfish fueled by hydrogen from the water around it:

RoboJelly is certainly not what we’re used to seeing when it comes to robots. Instead of a cold metallic skeleton, this softie is modeled after jellyfish which have no bones. But that’s not the only thing that’s unusual about it. This robot also doesn’t carry its own power source. It gets the energy needed for locomotion from the water around it.
Artificial muscles are what give this the movement seen in the clip after the break. These muscles react to heat, and that heat is produced through a chemical reaction. The construction method starts with the muscle material, which is then covered in carbon nanotubes, and finally coated with black platinum dust. Sounds a bit like witchcraft, huh (Eye of newt, dragon heart string, etc.)? We certainly don’t have the chemistry background to understand how this all works. But we are impressed. So far it doesn’t have the ability to change direction, the flexing of all of the muscle material happens at the same time. But the next step in their research will be finding a way to route the “fuel” to give it some direction.
Edit – Looks like it is fueled externally. The actual study is here, but you need to log in to download it.
This brings another jellyfish-inspired robot to mind. Check out FESTO’s offering which flies through the air with the greatest of ease.

[via Reddit]

Filed under: robots hacks

How New York Pay Phones Became Guerrilla Libraries

How New York Pay Phones Became Guerrilla Libraries:
05
How New York Pay Phones Became Guerrilla Libraries – The Atlantic Cities via G+
John Locke thinks people should read more. So in the past few months, the Columbia architecture grad has slipped around Manhattan with a sack of books and custom-made shelves, converting old pay phones into pop-up libraries.

Wednesday, March 21, 2012

HOW-TO: Make realistic 3D renderings of PCB designs

HOW-TO: Make realistic 3D renderings of PCB designs:

3D models in Google SketchUp look great, but with a few extra plugins the results can look photo-realistic. In this tutorial we’ll cover our experience with the Maxwell for Google Sketchup rendering plugin.
The Maxwell Fire engine is easy to use. It’s integrated directly into SketchUp so you don’t need to open any other application to render photo-realistic images of your models.
The goal of this guide is to help you make awesome looking images of your projects for documentation and presentation.
You’ll need to have SketchUp and a model to try this tutorial. If you haven’t already, check out our tutorial on how to build 3D models from Cadsoft Eagle board(.brd) files.

Grab the Maxwell rendering engine for Google SketchUp
If you have SketchUp installed, download and install Maxwell for Google SketchUp (free version) rendering engine.
Open the model and activate the Maxwell toolbar

Open a model in SketchUp. If the Maxwell toolbar isn’t activated go to ‘View’ -> ‘toolbars’ -> ‘Maxwell’ and check it. The toolbar should look like the picture above.
Going from left to right the important buttons on the toolbar are:
  • Maxwell Fire – Start rendering the image
  • Browse for an MXM file – Search for material files
  • Browse the MCM gallery – Open a materials gallery (if you have one)
  • MXM Status Report – Display all the materials used in the model
  • Scene Manager – Opens a GUI to adjust the materials, lighting conditions, camera options, etc…
  • Material Picker Tool – selects a material in the model
  • Pick DOF, Z-Clip or Z-buffer – Choose camera options and location
  • Set focal distance – Sets the focal point of the image
Edit model materials

Maxwell comes with several predefined materials, such as metal and plastics, that look way more realistic than the SketchUp defaults. We’ll assign materials to each part of the model.
1. To edit the materials click the ‘Scene Manager’ button in the Maxwell toolbar. A window will open. Make sure you are in the ‘Materials’ tab (leftmost)

2. Click the ‘Entity/material selection tool’. Your mouse pointer should change its shape into a dropper like tool

3. Click on any surface to assign a material

Now that material is loaded into the ‘Scene Manger’ GUI. The name of the material is at the top. What we are interested is the ‘Character’ tab (leftmost, 3 small sliders in its icon). Here you can change the type of material you would like, for example, plastic, metal, glass, etc…

Each material has options for ‘Roughness’ and reflectiveness (Nd) that can be tweaked for maximum realism. As you change various options the preview window shows how the material looks when rendered.
Repeat the process for all the materials in the model that you feel need to be changed.
Choose the render viewpoint
When the materials are setup, swivel (middle mouse click) and move (hand tool) the model into the position you want to render.
Rendering options

Click ‘Maxwell Fire’ (leftmost) in the Maxwell toolbar. The image will immediately start to render with default settings.
There are a few options you can tweak that influence the length and quality of the rendering process. Click ‘Settings’ (rightmost button) to make changes:
  • SL – The number of iterations the engine will make during the render. Higher numbers mean higher quality, but longer render times. We recommend 15 passes
  • Threads – The number of threads the rendering engine uses on the computer. We recommend the same number of threads as there are cores in your CPU
  • Max.Res. – The resolution of the image. The highest resolution for the free version is 800px in width
Click ‘Done’ to save the settings.
Render the image

Click ‘GO’ (leftmost Button) to start the render. Sit back and wait for your final image. We find that it takes around 40 minutes to render an 800px image with 16 iterations on a AMD Phenom II x3 running at 3.6 GHz.
Save the image

Once your rendering is done, click ‘Save Image’. We prefer to export in PNG format, and convert to lower quality JPGs using GIMP or Photoshop.
Taking it further

The Maxwell rendering engine is great, but it’s not open source. In our next tutorial we show how to use the open source Kekythea rendering engine to make photo-realistic PCB renderings.

NEW PRODUCT – Optical Fingerprint Sensor, works with Arduino

NEW PRODUCT – Optical Fingerprint Sensor, works with Arduino:
Window-125

NEW PRODUCT – Optical Fingerprint Sensor, works with Arduino. Secure your project with biometrics – this all-in-one optical fingerprint sensor will make adding fingerprint detection and verification super simple. These modules are typically used in safes – there’s a high powered DSP chip that does the image rendering, calculation, feature-finding and searching. Connect to any microcontroller or system with TTL serial, and send packets of data to take photos, detect prints, hash and search. You can also enroll new fingers directly – up to 162 finger prints can be stored in the onboard FLASH memory. There’s a red LED in the lens that lights up during a photo so you know its working.
Window-1-67
We like this particular sensor because not only is it easy to use, it also comes with fairly straight-forward Windows software that makes testing the module simple – you can even enroll using the software and see an image of the fingerprint on your computer screen. But, of course, we wouldn’t leave you a datasheet and a “good luck!” - we wrote a full Arduino library so that you can get running in under 10 minutes. The library can enroll and search so its perfect for any project. We’ve also written a detailed tutorial on wiring and use. This is by far the best fingerprint sensor you can get.
Window-2-39
  • Supply voltage: 3.6 – 6.0VDC
  • Operating current: 120mA max
  • Peak current: 150mA max
  • Fingerprint imaging time: <1.0 seconds
  • Window area: 14mm x 18mm
  • Signature file: 256 bytes
  • Template file: 512 bytes
  • Storage capacity: 162 templates
  • Safety ratings (1-5 low to high safety)
  • False Acceptance Rate: <0.001% (Security level 3)
  • False Reject Rate: <1.0% (Security level 3)
  • Interface: TTL Serial
  • Baud rate: 9600, 19200, 28800, 38400, 57600 (default is 57600)
  • Working temperature rating: -20C to +50C
  • Working humidy: 40%-85% RH
  • Full Dimensions: 56 x 20 x 21.5mm
  • Exposed Dimensions (when placed in box): 21mm x 21mm x 21mm triangular
  • Weight: 20 grams
We wouldn’t leave you a datasheet and a “good luck!” - we wrote a full Arduino library so that you can get running in under 10 minutes. The library can enroll and search so its perfect for any project. We’ve also written a detailed tutorial on wiring and use. This is by far the best fingerprint sensor you can get.
In stock and shipping now.

Can Engineering be “Just a Job?”

Can Engineering be “Just a Job?”:
Over on EngineerBlogs, Chris Gammell has written up a post asking his readers if they think that engineering can be “just a job” — that is, can engineering be just something you do to make money, or does it have to be more than that. Obviously, there’s no practical reason why this can’t happen. I think what he really wants to know is if there are a significant number of folks who are actually doing that, as opposed to doing engineering because there’s nothing else they’d rather be doing. I’m curious about this too.
While engineering is still a potentially lucrative career path, from an income perspective it cannot compete with the financial fields today. As such, it would seem that most people today who choose engineering as a career would do so because they like building things and figuring out how things work.
Chris has gotten some great responses to his post over on EB, but I wanted to post it here on Adafruit too, because it’s something I’m curious about as well, and because we have a very diverse audience here.
So what do you think? Do people still enter the engineering field simply because it provides a comfortable living, or is the ‘making a living’ aspect only a small part of why they (you!) choose engineering as a career?

Sunday, March 18, 2012

SweepGen – Turn your PC into an Audio Oscillator

SweepGen – Turn your PC into an Audio Oscillator:

SweepGen turns a PC into an Audio Oscillator and Sweep Generator which can be used for testing audio or educational purposes. In conjunction with audio test instruments, you can make frequency response plots. SweepGen uses the sound card in your PC to produce sine waves that are mathematically correct almost to CD quality, indeed it’s more likely that the quality of your PC sound card will be the limiting factor rather than the code in SweepGen.
SweepGen – Turn your PC into an Audio Oscillator - [Link]

App Note: Comparing digital and mechanical potentiometers

App Note: Comparing digital and mechanical potentiometers:

Microchip compares mechanical and digital potentiometers to digital. This app note explains the theory behind both versions, and their advantages and disadvantages.
Mechanical potentiometers have advantages in terms of having a wide variety of values available and tighter specifications such as nominal resistance, tolerance, temperature coefficient, power rating and temperature range specifications. But in many applications the overriding

factors are related to environmental and reliability issues. These characteristics are not necessarily specified by the mechanical potentiometer vendor.
Digital potentiometers go hand in hand with the drive towards digital system control. This type of potentiometer is considerably more robust that its predecessor, the mechanical potentiometer, in terms of environmental exposure issues and longevity with repeated use of the wiper. But beyond the reliability issues, the digital potentiometer offers hands-off programmability. This programmability also allows the user to repeatedly and reliably return to the same wiper position.

Free online DSP book

Free online DSP book:

Squonk alerts us to a very interesting online resource. California Technical Publishing has posted a complete copy of The Scientist and Engineer’s Guide to Digital Signal Processing by Steven W. Smith, PhD. This 640 page volume covers all aspects of DSP and is both searchable online and downloadable. The site also includes links to software and code examples from the book.
Though it appears to be the 1997 edition, this is still a valuable resource for beginners wanting to learn about DSP without investing a lot of money.
Via the contact form.

App notes: Operational amplifiers for anyone

App notes: Operational amplifiers for anyone:

Here is an comprehensive guide to operational amplifiers from Texas Instruments. It contains many if not all of the things you ever wanted to know about designing with op amps. History, design examples, and theory is all covered by this guide.
Via Electronics-Lab.

Thursday, March 15, 2012

N-Ch Power MOSFET Switch

N-Ch Power MOSFET Switch:

Derek Wolfe writes:
This circuit allows a simple switch or a low voltage pulse (5V for example) to control a large dc load. There’s a good explanation of MOSFET transistors and how to use them as a switch here. This is great for connecting a large load to a microcontroller or other logic circuit. Power MOSFET transistors are perfect for this application and can handle high voltage and current (100V, 77A for the NTP6411). This design would be able to power almost any load you can think of (probably even your car).
N-Ch Power MOSFET Switch - [Link]

Electric Fence – 20KV pulses for perimeter defense

Electric Fence – 20KV pulses for perimeter defense:
Radu Motisan writes:
Here is an electric fence, perimeter protection circuit, designed to run on batteries, and provide configurable pulses of up to 20KV, to protect a tent perimeter against bears or other animals, out in the wild.
The high voltage generated is not dangerous because of the low current (and power), but it will produce intense pain.
Electric Fence – 20KV pulses for perimeter defense - [Link]

Out of ‘hobby’ class, drones lifting off for personal, commercial use

Out of ‘hobby’ class, drones lifting off for personal, commercial use:
20120314-162946-Pic-432918474 S630X473
Out of ‘hobby’ class, drones lifting off for personal, commercial use @ Washington Times.
Jordi Munoz had no training. Scant schooling. Little money. He also had a video-game console and nothing else to do.

So he built his own drone.
A Mexican native, Mr. Munoz married an American citizen and moved to Riverside,Calif., in 2007. While waiting for his green card, the 21-year-old was marooned in his apartment, unable to work, attend school or obtain a driver’s license.
On the other hand, he had an Internet connection. A Nintendo Wii. A radio-controlled toy helicopter his mother had given him to help kill time.
Tinkering with the Wii’s control wand and a $60 gyroscope he had purchased on eBay, he modified the helicopter to fly itself, just like the $5 million Predator unmanned aerial vehicles deployed by the U.S. military.
Five years later, Mr. Munoz is co-founder and CEO of 3D Robotics, a San Diego-based company that has 18 employees and earned more than $300,000 in revenue in December producing components for hobbyist drones.
Read more.

Cell Cycle webGL design app

Cell Cycle webGL design app:
Cell Cycle webGL design app.

Cell Cycle webGL design app - a dynamic physible from Nervous System on Vimeo.
Cell Cycle is a webGL design app for creating 3d-printable cellular models.
You can shape, twist, and subdivide, transforming a simple mesh to a complex patterned structure. It’s a playful, dynamic physible.
You can make jewelry, lamp shades, sculptures… whatever you want, entirely in the browser.
n-e-r-v-o-u-s.com/cellCycle

The largest collection of XBee projects on the Web

The largest collection of XBee projects on the Web:
Pt 778

The largest collection of XBee projects on the Web. Super smart, nice work Digi – all electronic companies should do this :)
We would like to introduce you to the largest collection of XBee projects on the Web. So many of you are using XBee radios to create amazing things, that we’ve created a place to feature your work. Musical shoes, digital dominoes, interactive sculptures and autonomous penguins await!
The Tweet-a-Watt is there!.

Tuesday, March 13, 2012

Control an Arduino from Android over Bluetooth

Control an Arduino from Android over Bluetooth:

Whether you’d like to do some real-time logging of data, or just want to control a project with your Android phone, [Thomas]‘s Arduino-Android Bluetooth connection instructable is sure to be useful
[Thomas]‘ build uses the very inexpensive JY-MCU Bluetooth module that’s available on eBay or dealextreme. This Bluetooth module ties directly into the Tx and Rx lines of the Arduino so a wireless serial connection between an Android device can be established. On the Android side of the build, Python for Android and the Scripting Layer for Android allow for reading wireless sensor data over Bluetooth.
While connecting an Android device to an Arduino is also possible with an IOIO  or an Android Open Accessory dev kit, we haven’t seen much (barring this) about controlling or reading simple electronics with Android over Bluetooth. Sometimes you just don’t need an awesome dev board to bodge up a simple project, so we hope [Thomas]‘s very nice instructable will help get a few more builds off the ground.

Filed under: android hacks, arduino hacks

World’s Smallest Laser Is Smaller Than Dust

World’s Smallest Laser Is Smaller Than Dust:
What is the biggest constraint in creating tiny lasers? Pump power. Yes sir, all lasers require a certain amount of pump power from an outside source to begin emitting a coherent beam of light and the smaller a laser is, the greater the pump power needed to reach this state. The laser cavity consists of a tiny metal rod enclosed by a ring of metal-coated, quantum wells of semiconductor material. A team of researchers from the University of California has developed a technique that uses quantum electrodynamic effects in coaxial nanocavities to lower the amount of pump power needed. This allowed them to build the world’s smallest room-temperature, continuous wave laser. The whole device is only half a micron in diameter (human hair has on average a thickness of 50 micron). [via]
World’s Smallest Laser Is Smaller Than Dust - [Link]

Programmable Maximum Power Point Tracking Controller for Photovoltaic Solar Panels

Programmable Maximum Power Point Tracking Controller for Photovoltaic Solar Panels:

The SM72441 is a programmable MPPT controller capable of controlling four PWM gate drive signals for a 4-switch buck-boost converter. Along with SM72295 (Photovoltaic Full Bridge Driver) it creates a solution for an MPPT configured DC-DC converter with efficiencies up to 98.5%. Integrated into the chip is an 8-channel, 12 bit A/D converter used to sense input and output voltage and current, as well as board configuration. Externally programmable values include maximum output voltage and current as well as different settings on slew rate, and soft-start.
Programmable Maximum Power Point Tracking Controller for Photovoltaic Solar Panels - [Link]

Precise and price-convenient measuring of AC current

Precise and price-convenient measuring of AC current:

With current transformers, you can measure AC current simply and with a sufficient accuracy, moreover with maintaining of a high safety level thanks to a galvanic isolation.
General purpose AC current measurment, overload and shortcut protection, load drop or shutdown detection and similar application require simple and reliable solution. Current transformers meet all these requirements and they add further bonuses like galvanic isolation, no intervention to a measured circuit and a convenient price.
As we know, one of AC current measurement methods is based on the usage of a current transformer. Alternating magnetic field around a wire lead, which in a continual proportion to a current flowing through a wire, will induce an AC voltage in a measurement transformer. At a suitable construction and a right transformer loading, is the output voltage in a continual proportion to a current in a measured lead. Perhaps the biggest advantage of this method is the fact, that a measuring circuit is galvanically isolated from a measured lead and at the same time, the transformer doesn´t indtroduce any added load neither any influence. If we´d like to go to a detail, the transformer consumes a negligible amount of energy of few tens of mW/10A from a measured lead, which is being lost in the winding and a load of the transformer.
Every current transformer is designed for a certain load, i.e. at a certain load it provides most accurate results. For example for the type AC-1050 it is 100 Ohms. In such a case is valid a transfer ration 1000:1, i.e. to the load flows a 10 mA current at a 10A current in a measured lead. It means, that on a 100 Ohm we will measure a voltage with a value of 1V. Output of a current transformer can be connected to a panel meter, digital voltmeter, oscilloscope or an AD converter input. By using an AD converter, it is also possible to monitor a course of a current and to discover various nonlinearities in a power consumption.
Talema current transformers are top quality components with an outstanding quality / price ratio. Transformers are designed for soldering into a PCB. In our offer you can find more types, up to 100A maximum current. Currently we can offer you type AC 1050 also from the producer´s stock (ca. 8000 pcs) with 1-2 weeks delivery time (standard delivery time uses to be 20 weeks). Detailed information will provide you datasheets at given types.

Precise and price-convenient measuring of AC current - [Link]

HOW-TO: Make parts in Cadsoft Eagle

HOW-TO: Make parts in Cadsoft Eagle:

Eagle’s popularity is partly due to the sheer number of parts and footprint libraries available for it. Sometimes you can’t find the part you need in an existing library though, and it’s time to make your own. Making a new part in Cadsoft Eagle can be intimidating for new users, but the guide below shows how we make our own Eagle parts step by step. Alternately you can check it out on the Wiki.
This post is long, so click on the title and redirect to Dangerous Prototypes website for the full post.

How Raven, the Open Source Smart Robotic Helper, is Changing Surgery

How Raven, the Open Source Smart Robotic Helper, is Changing Surgery:

How Raven, the Smart Robotic Helper, is Changing Surgery @ Popular Mechanics.
When researchers at the University of Washington created a new version of Raven, their robotic surgical assistant, they allowed the bots to work with open-source code and sent out Raven IIs to research labs around the country. Here’s what happened…

Why it’s China’s turn to worry about manufacturing

Why it’s China’s turn to worry about manufacturing:
Why it’s China’s turn to worry about manufacturing @ The Washington Post via Tim.
America has been extremely worried about the loss of manufacturing to China. Seduced by subsidies, cheap labor, lax regulations, and a rigged currency, American industry has made a beeline to China. New technologies will likely cause the same hollowing out of China’s manufacturing industry over the next two decades that the U.S experienced over the past twenty years. That’s right. America is destined to once again gain its supremacy in manufacturing, and it will soon be China’s turn to worry.
China’s largest hi-tech product manufacturer Taiwan-based Foxconn Technology Group, made waves last August when it announced plans to install one million robots within three years to do the work that its workers presently do. These robots will perform repetitive, mechanical tasks to produce the circuit boards that go in many of the world’s most popular consumer gadgets. But even these robots and circuit boards will soon be obsolete.
..What happens when you combine AI, robotics, and digital manufacturing? A manufacturing revolution, that will enable U.S. entrepreneurs to “set up shop” locally, and create a wide variety of products. As Kinko’s is for 2D digital printing on paper, we will have shared public manufacturing facilities like TechShop where you can print your 3D products. How is China going to compete with that?

Welcome To The Machine

Welcome To The Machine:
Welcome To The Machine.

Welcome To The Machine :: Trailer from Avi Weider on Vimeo.
Upon becoming the father to triplets, filmmaker Avi Zev Weider explores the nature of technology. Woven together with expert interviews and portraits of people who have intimate relationships with technology, “Welcome To The Machine” takes the conversation away from the business of technology or the latest gadgets and leads the audience to ultimately consider questions of life and death, revealing that all discussions about technology are really about what it means to be human.

NASA – Second Biggest Flare Of the Solar Cycle

NASA – Second Biggest Flare Of the Solar Cycle:
628398Main Flare-X5
NASA – Second Biggest Flare Of the Solar Cycle.
The models also predict that the leading edge of the first CME will reach Earth at about 1:25 AM EST on the morning of March 8 (plus or minus 7 hours). Such a CME could result in a severe geomagnetic storm, causing aurora at low latitudes, with possible disruption to high frequency radio communication, global positioning systems (GPS), and power grids.
Just a preventive FYI if something crazy happens today :)